To improve your upload speed, try these tips:
Enable Quality of Service (QoS) settings
Switch to a different Wi-Fi channel or band
Use a VPN
Reduce background upload processes
Verify your internet plan
Restart or reset your modem/router
Use a wired connection
Update firmware
Limit network usage
Optimize router placement
Upgrade your internet plan or ISP
Wondering how to improve upload speed on your internet?
Have you ever been on an important video call, but your screen kept freezing? Or maybe you’ve tried to back up family photos to the cloud, but the progress bar didn’t move for hours. Slow upload speeds can turn everyday tasks into frustrating ordeals — whether you’re working remotely, gaming online or sharing content.
In today’s connected world, upload speed is more important than ever. It ensures smooth video calls, quick file transfers and timely cloud backups — all of which are crucial for protecting your data.
The good news? Boosting your upload speed is easier than you might think. In this guide, we’ll walk you through 11 simple ways to increase upload speed and keep your online life running smoothly.
What Is Upload Speed?
Upload speed refers to how quickly data travels from your device to the internet. Whether you’re sending emails, uploading photos to the cloud or streaming live video, upload speed determines how fast that information reaches its destination. It’s measured in megabits per second (Mbps), and a faster upload speed means smoother uploads with less waiting.
While download speed often gets more attention, upload speed is just as crucial — especially for activities like video conferencing, online gaming and backing up files. A slow upload speed can cause lag during video calls, delays in sending large files and even impact the performance of smart home devices.
Difference Between Upload Speed and Download Speed
Upload speed and download speed serve two different purposes in your internet connection. Upload speed measures how fast data travels from your device to the internet, like when you send emails, post videos or back up files to the cloud. On the other hand, download speed measures how quickly data comes from the internet to your device — whether you’re streaming movies, browsing websites or downloading files.
| Upload Speed | Download Speed |
|---|---|
| Sends data from your device to the internet | Receives data from the internet to your device |
| Crucial for video calls, cloud backups and online gaming | Essential for streaming, downloading and browsing |
| Usually slower in standard internet plans | Typically faster to support common online activities |
| Impacts how quickly others receive your files or live video | Affects how quickly content loads on your screen |
11 Tips to Increase Your Upload Speed
Wondering how to fix upload speed? These 11 simple tips can help improve your connection.
1. Use a VPN
If you’ve noticed slow upload speeds, using a VPN (virtual private network) might help bypass any slowdowns caused by your internet provider. A VPN works by rerouting your internet traffic through a different server, which can sometimes improve speed by avoiding certain restrictions your provider might impose.
To get the best results, choose a well-known VPN service that’s known for speed. You’ll also want to pick a nearby server to keep speeds fast. After connecting, check your upload speed again to see if it has improved. For many, a VPN can help with faster uploads, especially when sending large files or during video calls.
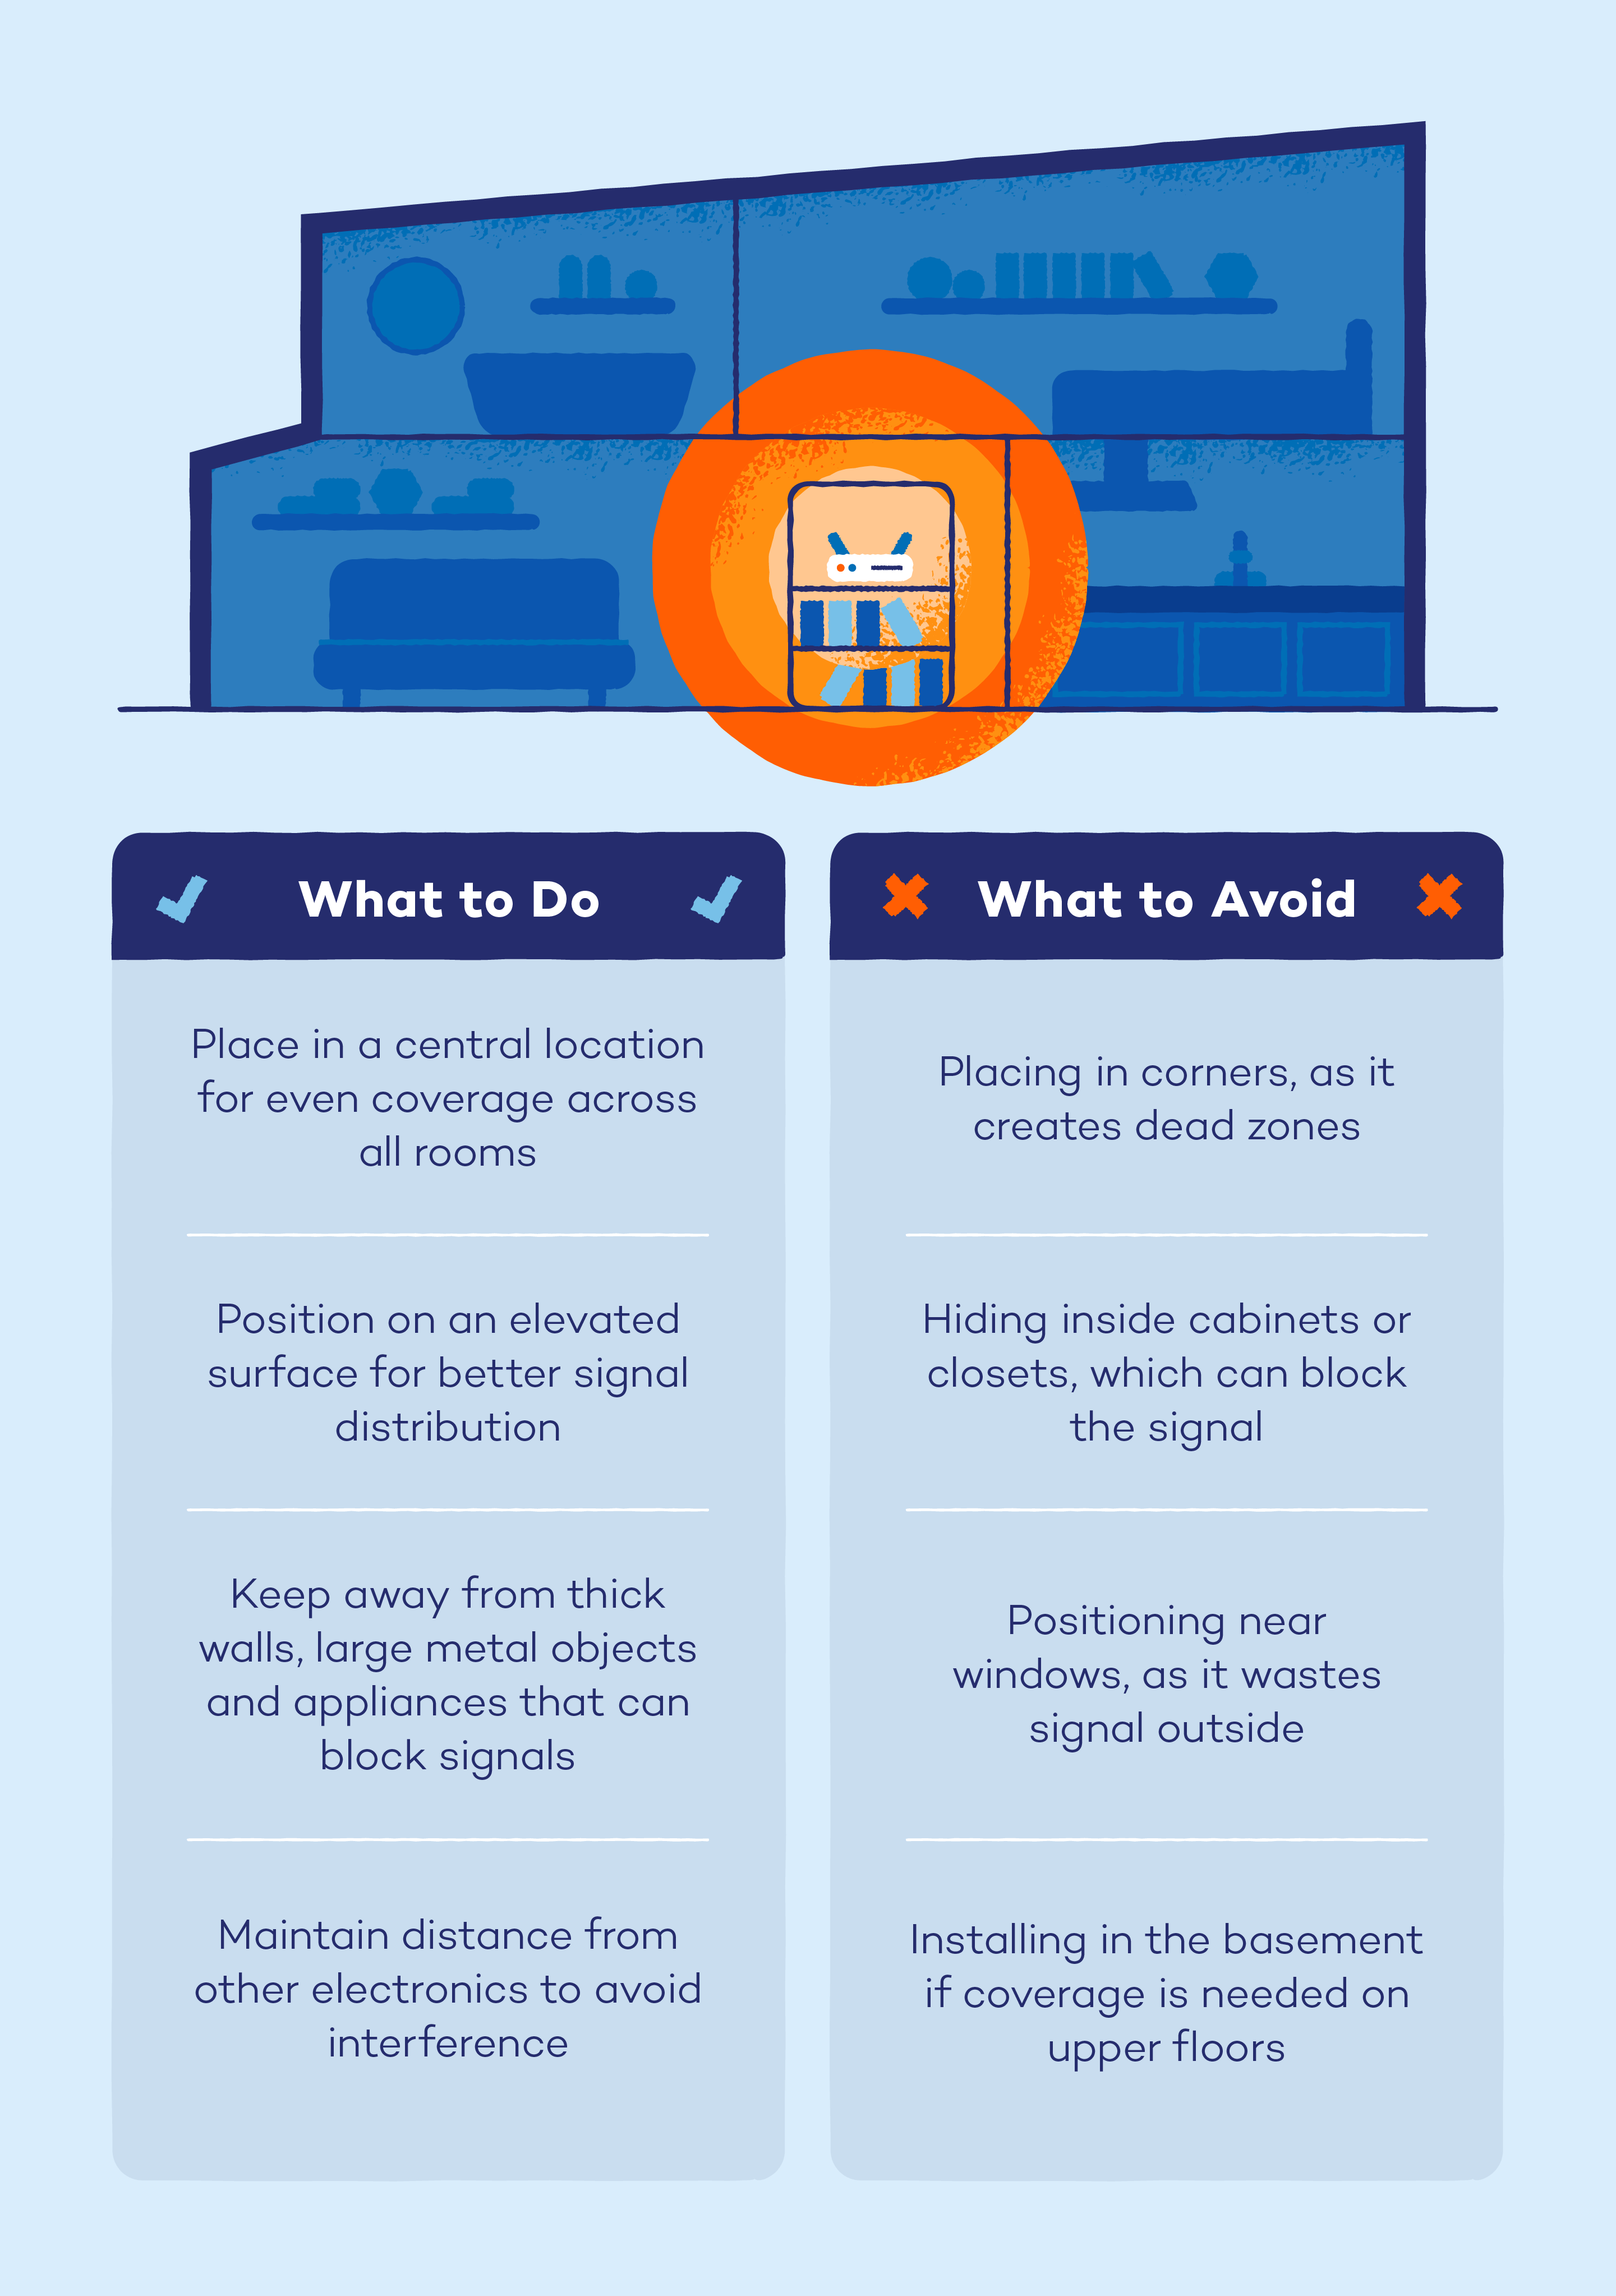
2. Optimize Router Placement
Where you place your router has a big impact on your internet speed. Walls, furniture and even household appliances can block or weaken the signal, which affects both download and upload speeds.
For the best performance, place your router in a central location, elevated off the floor and away from obstructions like thick walls or large metal objects. Avoid placing it near devices that emit signals, like microwaves or cordless phones, as they can cause interference. Optimizing your router’s placement helps ensure a stronger, more reliable connection throughout your home.
Reduce Background Upload Processes
Background apps and devices can quietly use up your internet connection without you even noticing, especially when they’re uploading data. These include things like cloud backups, automatic software updates and syncing apps. While these activities are helpful, they can slow down your upload speeds when sending large files or video chat.
To improve your upload speed, check your devices for any background processes that might be running. Pause or schedule backups and updates to happen when you’re not actively using the internet. By minimizing these activities, you can free up more bandwidth for tasks that require a faster connection.
4. Restart or Reset Your Modem/Router
If you’re experiencing slow upload speeds, a simple restart of your modem or router might do the trick. Over time, your router can get bogged down with data, which can affect your connection. Restarting it refreshes the system and can clear up any issues causing a slowdown.
If a restart doesn’t improve things, try resetting your Wi-Fi router to its default settings. This can help clear any settings that might be causing issues. Just keep in mind that you’ll need to reconfigure your Wi-Fi settings afterward. Regularly restarting your modem and router can keep things running smoothly and improve your upload speeds.
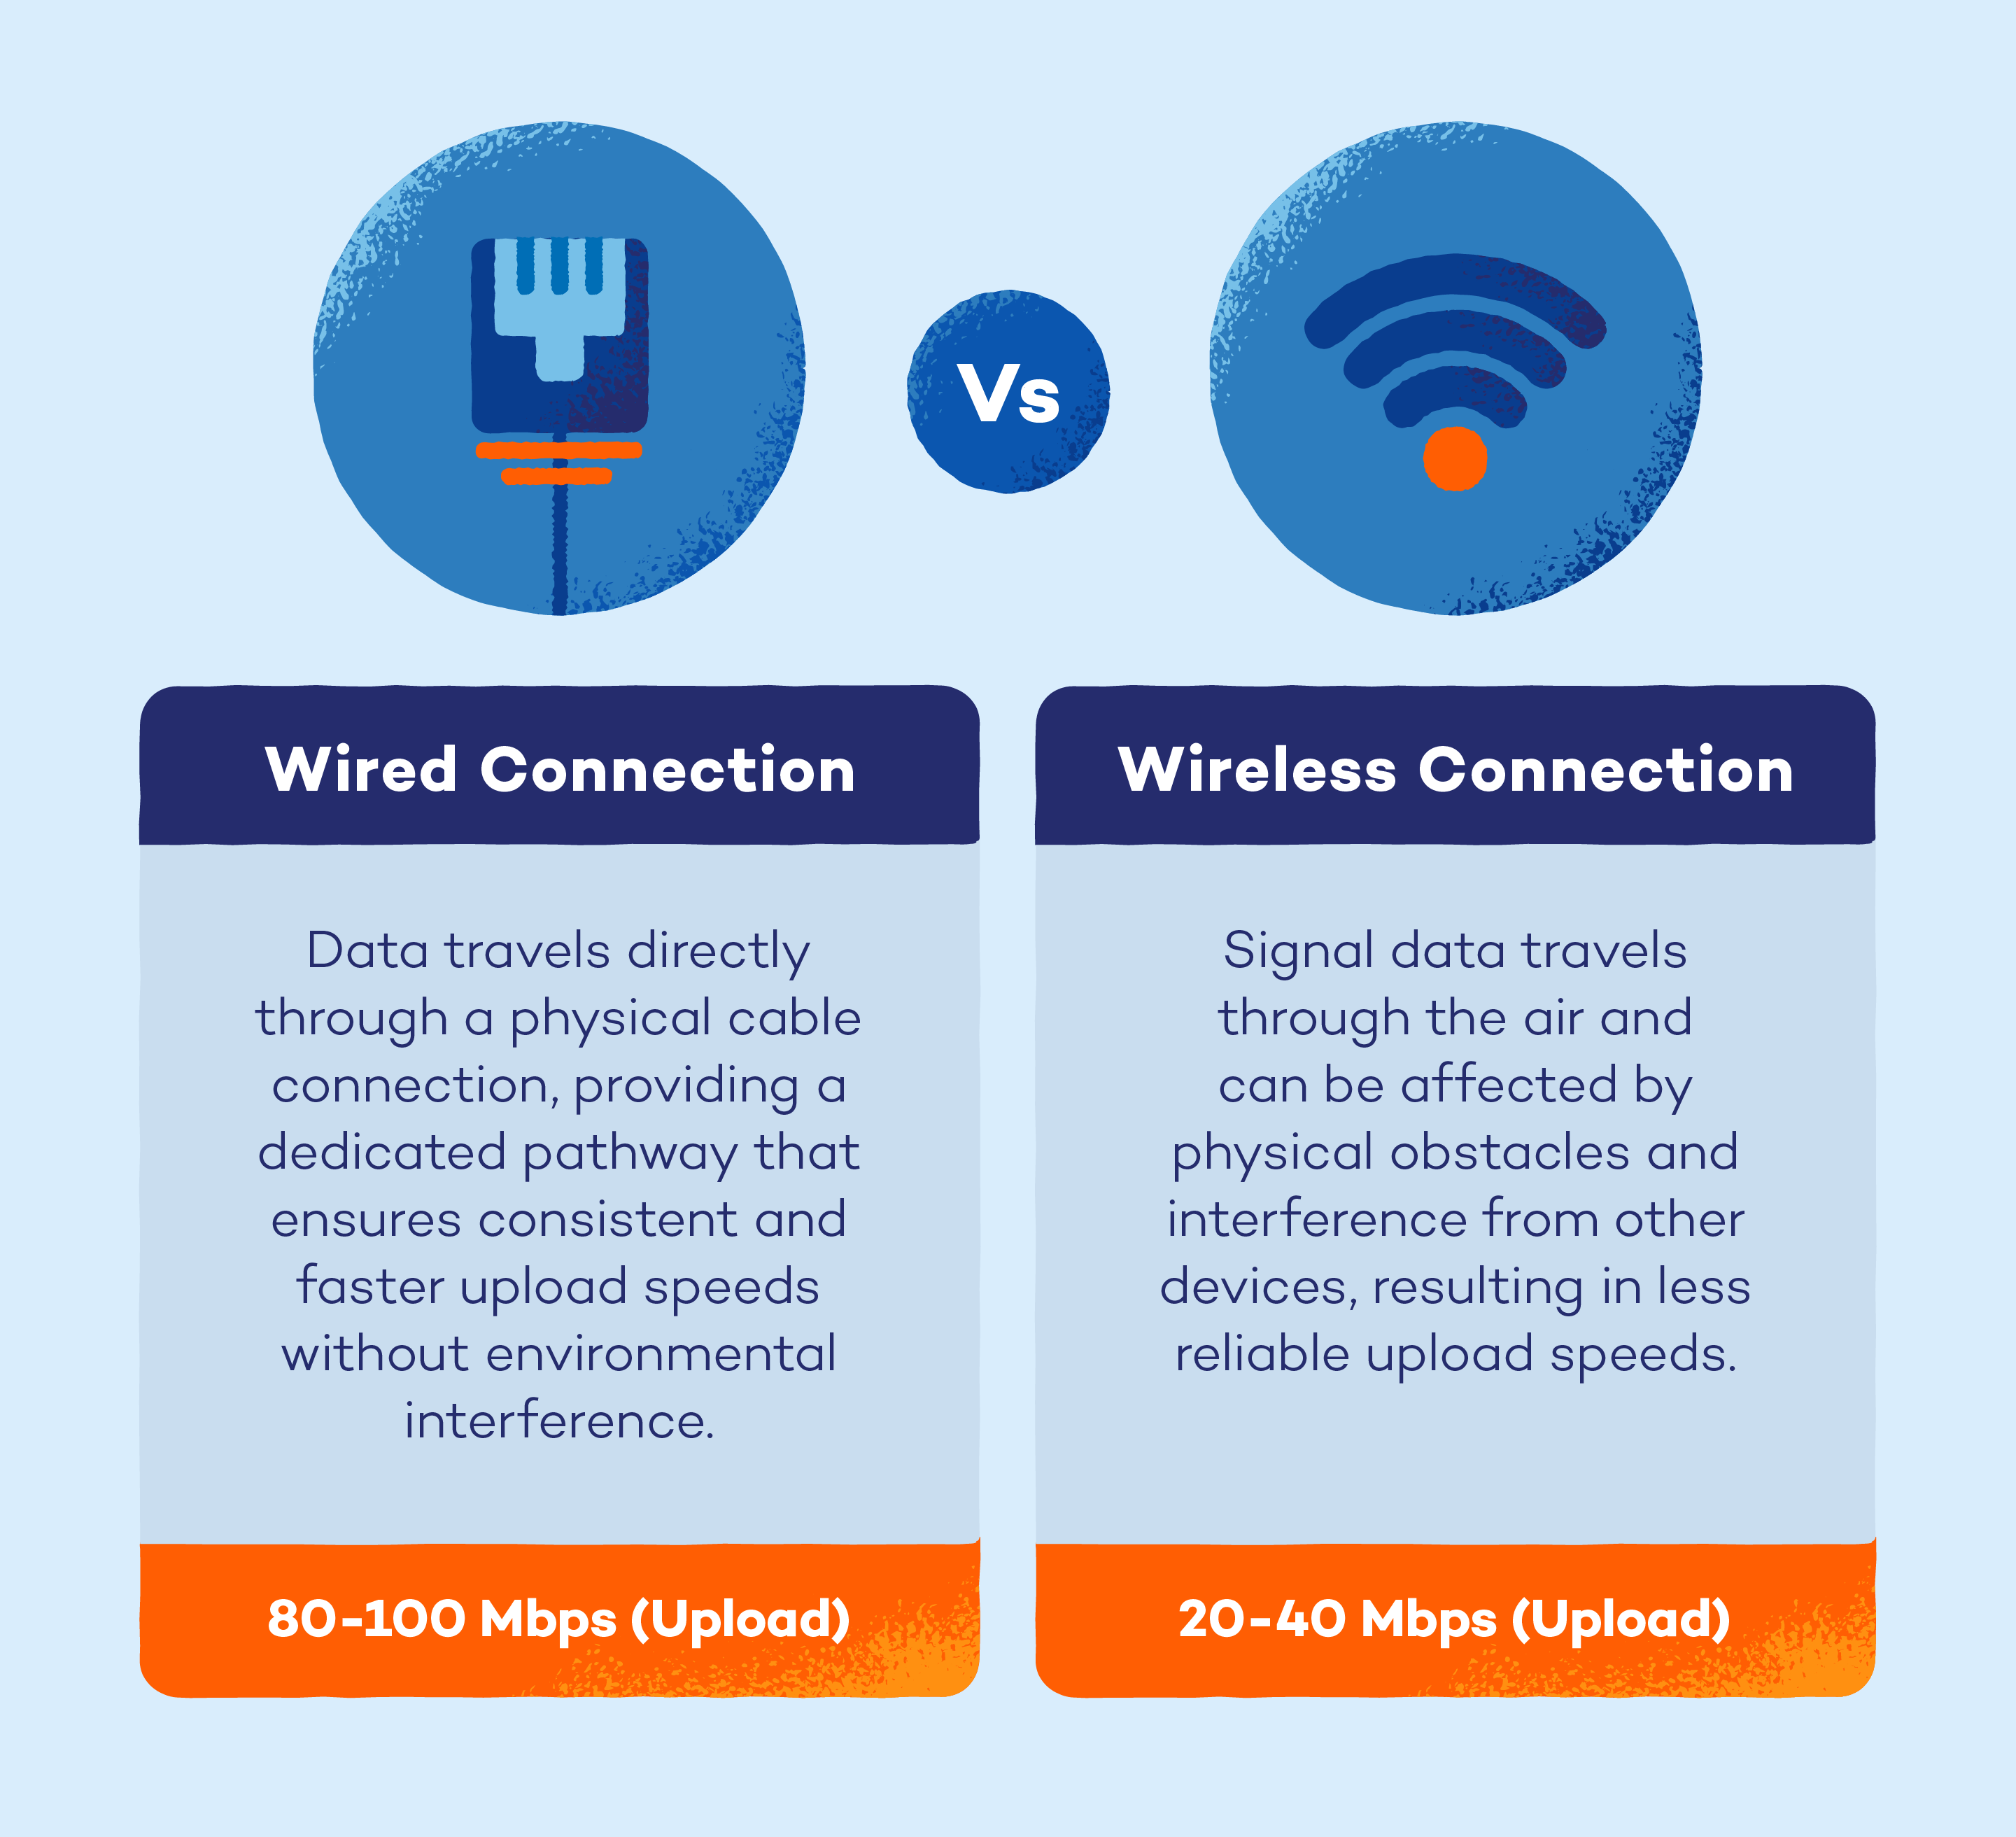
5. Use a Wired Connection
Switching from Wi-Fi to a wired connection can make a noticeable difference in your upload speeds. Wi-Fi can be affected by interference from other devices, walls or distance from the router, which can slow things down. A wired Ethernet connection, on the other hand, is more stable and reliable.
Simply connect your computer or device directly to your router using an Ethernet cable, and you’ll likely see faster, more consistent upload speeds. This is especially helpful when uploading large files or during video calls where every second counts.
6. Clear Browser Cache and Cookies
Over time, your browser stores data that can slow things down. Clearing the cache and cookies helps refresh your connection, potentially boosting upload speeds. It’s a quick fix that can make a noticeable difference, especially if you upload files directly through your browser.
Here’s how to do it:
- Google Chrome: Go to Settings > Privacy and security > Delete browsing data > Select Cookies and cached images > Clear data
- Safari: Click Safari > Preferences > Privacy > Manage Website Data > Remove All
- Firefox: Go to Settings > Privacy & Security > Clear Data > Select Cookies and Cache > Clear
7. Update Firmware
Your router is like a mini computer that runs on software called firmware, which helps manage your internet connection. Over time, outdated firmware can cause performance issues, including slow upload speeds. Manufacturers often release updates to improve performance, fix bugs and enhance security.
To update your router’s firmware, log into its settings through a web browser (usually by typing something like 192.168.1.1 into the address bar). Look for an option like “Firmware Update” or “Router Update.” If an update is available, follow the prompts to install it. Keeping your router up-to-date ensures it runs smoothly and gives you the best possible speeds.
8. Limit Network Usage
When multiple devices are using your network at the same time, it can slow down your upload speeds. Activities like streaming, online gaming or large downloads eat up bandwidth, leaving less room for uploads.
To improve speeds, try limiting the number of devices connected to your network, especially when you’re uploading files or on an important video call. You can also pause data-heavy activities like streaming or gaming while you focus on tasks that require faster uploads. This ensures your connection is prioritized where you need it most.
9. Enable Quality of Service (QoS) Settings
QoS is a router feature that prioritizes specific types of internet traffic, helping boost upload performance for critical activities like video calls and file sharing. Here’s how to enable it:
- Access your router settings: Open a web browser, enter your router’s IP address (e.g., 192.168.1.1) and log in.
- Locate QoS settings: Navigate to “Advanced Settings,” “QoS,” or “Traffic Management,” often located under the “Wireless” or “Network” tabs.
- Enable QoS: Find and activate the “Enable QoS” option.
- Set priorities: Create rules to prioritize devices or activities like video calls, gaming or cloud backups.
- Apply changes: Save your settings and reboot the router if necessary.
With QoS enabled, your most important online activities will get the bandwidth they need, ensuring smoother uploads even during busy internet usage.
10. Switch to a Different Wi-Fi Channel or Band
Wi-Fi interference occurs when multiple devices or networks use the same or overlapping frequencies, leading to congestion. This interference can slow down your connection, causing delays or buffering, especially for upload-heavy activities.
- Check your current channel: Use tools like Wi-Fi analyzers to see which channels are being used by nearby networks.
- Switch to a less crowded channel: In your router settings, select a channel with less interference. For 2.4 GHz networks, try channels 1, 6 or 11.
- Use the 5 GHz band: If your router supports it, switch to the 5 GHz band, which is typically less crowded and offers faster speeds for shorter distances.
11. Upgrade Your Internet Plan or ISP
If you’ve tried everything and your upload speeds are still slow, it might be time to consider upgrading your internet plan or switching to a different provider. Some internet plans prioritize download speeds over uploads, which can be frustrating if you regularly back up files to the cloud, video chat or game online.
Check with your current provider to see if they offer plans with faster upload speeds. If they don’t, it might be worth shopping around for an ISP that better fits your needs. A plan with higher upload speeds can make a noticeable difference, especially for remote work and content creation.
Stay Fast and Secure With Smart Networking Habits
Achieving a faster internet connection is easier than you might think. By following these simple steps on how to increase upload speed, you can enjoy a smoother online experience, whether you’re working from home, sharing files or video chatting.
For added security and privacy while browsing or uploading, use a VPN to help protect your data from prying eyes. Panda Dome Complete offers an easy way to secure your internet connection and ensure your online activities stay safe.
FAQ
Have more questions about upload speed? Here are some common questions and simple answers to help you troubleshoot and improve your connection.
Why Is My Upload Speed Slow and How Can I Fix It?
Slow upload speeds can be caused by several factors, such as network congestion, a weak Wi-Fi signal, outdated hardware or high traffic from other devices.
To fix it, try some simple solutions like rebooting your router, switching to a wired connection or reducing the number of devices connected to your network. If your internet plan has limited upload speeds, consider upgrading to a plan that offers faster speeds.
How do I Check my Upload Speed?
You can easily check your upload speed by using online speed test tools. Websites like Speedtest.net allow you to run a quick test that shows your upload and download speeds.
Simply visit the website, click “Go,” and wait for the results to display. This will give you an accurate measurement of how fast you’re uploading data.
What Is the Ideal Upload Speed?
If you work from home, upload large files or video conference often, you’ll want at least 10 Mbps or higher. For high-quality video streaming or large cloud backups, a speed of 20 Mbps or more is recommended.
Panda Security specializes in the development of endpoint security products and is part of the WatchGuard portfolio of IT security solutions. Initially focused on the development of antivirus software, the company has since expanded its line of business to advanced cyber-security services with technology for preventing cyber-crime.